vue2+Element ui 上传
<el-upload action="" :auto-upload="false" multiple :limit="1"  :on-change="handleChange"
           :file-list="files1">
    <el-button size="small" type="primary">新增</el-button>
</el-upload>
handleChange(file) {
    var formData = new FormData();
    formData.append("files", file.raw);
    formData.append("relationid", this.fileCollectionDeleteData);
    formData.append("groupid", "original");
    formData.append("sortNum", this.designList.length + 1);
    uploadFile(formData).then((response) => {
        this.files1 = [];
        this.$message.success("上传成功");
        this.init()
    }).catch(err => {
        this.Loading = false;
    });
},
vxe-table 合并相同数据项 合并单元格
在vxe-table 中写入
:span-method="mergeRowMethod"这个然后调用这个方法即可
<vxe-table border resizable show-footer ref="xTable" align="center" :print-config="{}"
           :span-method="mergeRowMethod" :column-config="{ width: 140 }" :data="tableData" v-show="radio == 1">
    <vxe-column field="dept_id" title="序号"></vxe-column>
    <vxe-column field="name" title="项目名称"></vxe-column>
    <vxe-column field="bid_section_name" title="标段名称"></vxe-column>
</vxe-table>
methods:{
    mergeRowMethod({ row, _rowIndex, column, visibleData }) {
        const fields = ["bid_section_name", "name"];
        const cellValue = row[column.property];
        if (cellValue && fields.includes(column.property)) {
            const prevRow = visibleData[_rowIndex - 1];
            let nextRow = visibleData[_rowIndex + 1];
            if (prevRow && prevRow[column.property] === cellValue) {
                return { rowspan: 0, colspan: 0 };
            } else {
                let countRowspan = 1;
                while (nextRow && nextRow[column.property] === cellValue) {
                    nextRow = visibleData[++countRowspan + _rowIndex];
                }
                if (countRowspan > 1) {
                    return { rowspan: countRowspan, colspan: 1 };
                }
            }
        }
    },
}
随机生成验证码
最近做项目接触Vue,前端生成验证码。原理其实很简单,首先是生成随机数,然后用canvas绘制。 网上有一些现成的资料,没必要重复造轮子,我是在他们基础上完善了父组件,简化了子组件的调用: identify.vue(子组件):是一个独立的组件,负责生成验证码和绘制图片; codetest.vue(父组件):引入identify.vue(子组件),只有两个动作:发指令和接收验证码
identify.vue组件(主要用于定义参数和方法)
<template>
  <div class="s-canvas">
    <canvas id="s-canvas" :width="contentWidth" :height="contentHeight"></canvas>
  </div>
</template>
<script>
  export default{
    name: 'SIdentify',
    props: {
      fresh:true,
      fontSizeMin: {
        type: Number,
        default: 20
      },
      fontSizeMax: {
        type: Number,
        default: 36
      },
      backgroundColorMin: {
        type: Number,
        default: 180
      },
      backgroundColorMax: {
        type: Number,
        default: 240
      },
      colorMin: {
        type: Number,
        default: 50
      },
      colorMax: {
        type: Number,
        default: 160
      },
      lineColorMin: {
        type: Number,
        default: 40
      },
      lineColorMax: {
        type: Number,
        default: 180
      },
      dotColorMin: {
        type: Number,
        default: 0
      },
      dotColorMax: {
        type: Number,
        default: 255
      },
      contentWidth: {
        type: Number,
        default: 112
      },
      contentHeight: {
        type: Number,
        default: 38
      }
    },
    data() {
      return {
        identifyCodes: "1234567890",
        identifyCode: ""
      };
    },
    methods: {
      // 生成一个随机数
      randomNum (min, max) {
        return Math.floor(Math.random() * (max - min) + min)
      },
  // 生成一个随机的颜色
  randomColor (min, max) {
    let r = this.randomNum(min, max)
    let g = this.randomNum(min, max)
    let b = this.randomNum(min, max)
    return 'rgb(' + r + ',' + g + ',' + b + ')'
  },
  drawPic () {
    let canvas = document.getElementById('s-canvas')
    let ctx = canvas.getContext('2d')
    ctx.textBaseline = 'bottom'
    // 绘制背景
    ctx.fillStyle = this.randomColor(this.backgroundColorMin, this.backgroundColorMax)
    ctx.fillRect(0, 0, this.contentWidth, this.contentHeight)
    // 绘制文字
    for (let i = 0; i < this.identifyCode.length; i++) {
      this.drawText(ctx, this.identifyCode[i], i)
    }
//    this.drawLine(ctx)
    this.drawDot(ctx)
  },
  drawText (ctx, txt, i) {
    ctx.fillStyle = this.randomColor(this.colorMin, this.colorMax)
    ctx.font = this.randomNum(this.fontSizeMin, this.fontSizeMax) + 'px SimHei'
    let x = (i + 1) * (this.contentWidth / (this.identifyCode.length + 1))
    let y = this.randomNum(this.fontSizeMax, this.contentHeight - 5)
    var deg = this.randomNum(-10, 10)
    // 修改坐标原点和旋转角度
    ctx.translate(x, y)
    ctx.rotate(deg * Math.PI / 180)
    ctx.fillText(txt, 0, 0)
    // 恢复坐标原点和旋转角度
    ctx.rotate(-deg * Math.PI / 180)
    ctx.translate(-x, -y)
  },
  drawLine (ctx) {
//     绘制干扰线
    for (let i = 0; i < 3; i++) {
      ctx.strokeStyle = this.randomColor(this.lineColorMin, this.lineColorMax)
      ctx.beginPath()
      ctx.moveTo(this.randomNum(0, this.contentWidth), this.randomNum(0, this.contentHeight))
      ctx.lineTo(this.randomNum(0, this.contentWidth), this.randomNum(0, this.contentHeight))
      ctx.stroke()
    }
  },
  drawDot (ctx) {
    // 绘制干扰点
    for (let i = 0; i < 30; i++) {
      ctx.fillStyle = this.randomColor(0, 255)
      ctx.beginPath()
      ctx.arc(this.randomNum(0, this.contentWidth), this.randomNum(0, this.contentHeight), 1, 0, 2 * Math.PI)
      ctx.fill()
    }
  },
  // 生成四位随机验证码
  makeCode(o, l) {
        this.identifyCode="";
        for (let i = 0; i < l; i++) {
          this.identifyCode += this.identifyCodes[
            this.randomNum(0, this.identifyCodes.length)
            ];
        }

        //绘制图片
        this.drawPic()

        //传值给父组件
        this.$emit('makedCode',this.identifyCode);


  }
  },
  watch: {
    fresh () {   //监听事件
      this.makeCode(this.identifyCodes, 4);
    }
  },
  }
</script>
codetest.vue(在页面进行使用):
<template>
  <div class="code" @click="refreshCode">
 <!--   :fresh:父组件向子组件传送刷新验证码的信号;
    @makedCode:子组件向父组件传送验证码的值-->
    <s-identify :fresh="flag" @makedCode="getMakedCode"></s-identify>
  </div>
</template>

<script>
  import SIdentify from '@/components/identify.vue'
  export default {
    name: "codetest",
    data() {
      return {
        flag:true,  //该值变化,就会触发刷新
        code:'',  //刷新后的验证码
      };
    },
  components : {
    SIdentify,
  },
  // 验证码初始化
  mounted() {
    this.flag = !this.flag;
  },
  methods: {
    // 切换验证码
    refreshCode() {
      this.flag = !this.flag;
    },
    getMakedCode(code){
      this.code = code
      console.log("getMakedCode:",this.code);
    }
  }
  };
</script>

<style>
  .code {
    /*margin: 400px auto;*/
    width: 114px;
    height: 40px;
    /*border: 1px solid red;*/
  }
</style>
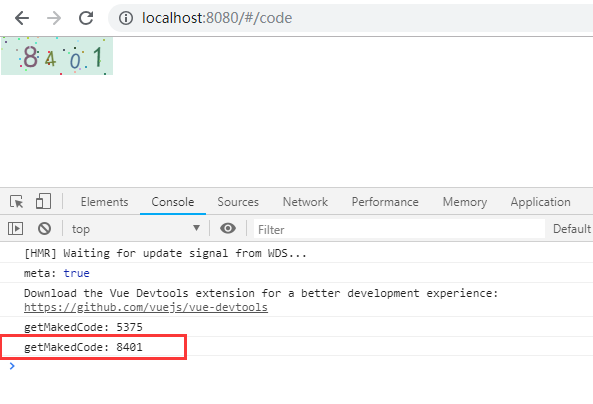
测试效果: