最新uniapp登录逻辑
<template>
  <view>
    <form>
      <button class="avatar-wrapper" open-type="chooseAvatar" @chooseavatar="onChooseAvatar">
        <image class="avatar" :src="avatarUrl"></image>
      </button>
      <input type="nickname" @blur="getnickname" placeholder="请输入昵称" />
      <button @click="submit"> 提交 </button>
    </form>
  </view>

</template>

<script>
  export default {
    data() {
      return {
        avatarUrl: 'https://mmbiz.qpic.cn/mmbiz/icTdbqWNOwNRna42FI242Lcia07jQodd2FJGIYQfG0LAJGFxM4FbnQP6yfMxBgJ0F3YRqJCJ1aPAK2dQagdusBZg/0',
        nickname: ""
      }
    },
    methods: {
      onChooseAvatar(e) {
        this.avatarUrl = e.detail.avatarUrl
      },
      getnickname(e) {
        this.nickname = e.detail.value
      },
      getDataTime() {
        // 得到时间参数
        function timestampToTime(timestamp) {
          var date = new Date(timestamp); //时间戳为10位需*1000,时间戳为13位的话不需乘1000
          var Y = date.getFullYear() + '-';
          var M = (date.getMonth() + 1 < 10 ? '0' + (date.getMonth() + 1) : date.getMonth() + 1) + '-';
          var D = (date.getDate() < 10 ? '0' + date.getDate() : date.getDate()) + ' ';
          var h = (date.getHours() < 10 ? '0' + date.getHours() : date.getHours()) + ':';
          var m = (date.getMinutes() < 10 ? '0' + date.getMinutes() : date.getMinutes()) + ':';
          var s = date.getSeconds() < 10 ? '0' + date.getSeconds() : date.getSeconds();
          return Y + M + D + h + m + s;
        }
        var timestamp = Date.parse(new Date());
        return timestampToTime(timestamp)
      },
      submit() {
        const db = wx.cloud.database();
        db.collection('userInfo').add({
            data: {
              dateTime: this.getDataTime(),
              headUrl: this.avatarUrl,
              nickName: this.nickname
            }
          })
          .then(res => {
            console.log(res)
            const db = wx.cloud.database();
            db.collection('userInfo')
              .doc(res._id)
              .get().then(res => {
                console.log(res);
                const lsData = {
                  userInfo: {
                    avatarUrl: this.avatarUrl,
                    nickName: this.nickname
                  }
                }
                uni.setStorage({
                  key: 'OpenId',
                  data: res.data._openid,
                  success: function () {
                  		console.log('OpenId___success');
                  	}
                })
                uni.setStorage({
                  key: 'infoRes',
                  data:lsData,
                  success: function () {
                  		console.log('infoRes___success');
                  	}
                })
                const db = wx.cloud.database();
                db.collection('userInfo').where({
                  _openid: res.data._openid,
                  dateTime: db.command.neq(res.data.dateTime),
                }).remove().then(() => {

                  uni.showToast({
                    title: "登陆成功",
                    duration: 1500,
                    success: (res) => {
                      uni.switchTab({
                        url: '/pages/index/index'
                      })
                    }
                  })
                })
              })
          })

        console.log(this.avatarUrl);
        console.log(this.nickname);
      }
    }
  }
</script>
调用接口
import {
    getNewsList
} from '@/api/user.js';
---
    onShow() {
    this.init()
},
    ---
        init() {

        getInfo({
            data: {

            }
        }).then(res => {
            if (res.code == 1) {
                console.log(res.data)
            }
        })

    },
uni.getUserProfile(OBJECT)--获取用户信息
获取用户信息。每次请求都会弹出授权窗口,用户同意后返回 userInfo。
将内容复制到剪贴板
uni.setClipboardData({
	data: 'hello',
	success: function () {
		console.log('success');
	}
});
将图片保存到本地
1.在main.js中 最下面进行注册
const saveImage = function(e) {
	uni.downloadFile({
		url: e,
		success: function(res) {
			console.log(res);
			//图片保存到本地
			uni.saveImageToPhotosAlbum({
				filePath: res.tempFilePath,
				success: function(data) {
					uni.showToast({
						title: '保存成功',
						icon: 'success',
						duration: 2000
					})
				},
				fail: function(err) {
					console.log(err);
					if (err.errMsg === "saveImageToPhotosAlbum:fail auth deny") {
						console.log("当初用户拒绝,再次发起授权")
						uni.openSetting({
							success(settingdata) {
								console.log(settingdata)
								if (settingdata.authSetting[
										'scope.writePhotosAlbum']) {
									console.log('获取权限成功,给出再次点击图片保存到相册的提示。')
								} else {
									console.log('获取权限失败,给出不给权限就无法正常使用的提示')
								}
							}
						})
					}
				},
				complete(res) {
					console.log(res);
				}
			})
		}
	})
}

Vue.prototype.$uniApi = {
	saveImage
};
- 在所需要的文件中进行引入然后进行调用
	import Vue from 'vue';

// 调用代码
	Vue.prototype.$uniApi.saveImage(this.cover)
长按图片可以保存,收藏,发送给朋友
show-menu-by-longpress
<image :src="img" mode="" show-menu-by-longpress></image>
长按保存图片
uni-app中长按保存图片
个人第二个项目是在小程序和app端的一款应用,在项目中需要使用到长按保存二维码功能,但uni-app官方的uni.saveImageToPhotosAlbum api只能传入文件路径,不支持网络路径,而我们大部分需要保存的图片基本都是网络路径,所以想到了uni.downloadFile,这个api会返还一个图片的临时路径,刚好可以作为参数使用saveImageToPhotosAlbum,所以问题就可以解决!

关于长按事件,我使用的是canvas的@longtop,不过这个不是难点,看需求只要能执行即可

1.放置二维码图片

<view class="CodeBox MarginAuto MarginT_20rpx BackgroundC_FFFFFF PaddingT_1rpx">
                <canvas style="width: 440rpx;height: 490rpx;" canvas-id="code" @longtap="bc_code">
					<image class="CodeImg Block" :src="codeImg" mode="widthFix"></image>
				</canvas>
</view>
//注意,canvas必须添加属性canvas-id,否则不显示
2.主体代码

//长按保存二维码
			bc_code(){
				let that = this;
				//console.log('保存二维码')
				uni.downloadFile({           //获得二维码的临时地址
					url:this.codeImg,
					success:(res)=>{
						//console.log('获取url',res)
						if(res.statusCode == 200){
							uni.saveImageToPhotosAlbum({
								filePath:res.tempFilePath,//传入临时地址
								success() {
									that.$.ti_shi('保存成功')//封装的提示
								},
								fail() {
									that.$.ti_shi('保存失败')
								}
							})
						}
					}
				})
			},
————————————————
版权声明:本文为CSDN博主「jiangbei-north」的原创文章,遵循CC 4.0 BY-SA版权协议,转载请附上原文出处链接及本声明。
原文链接:https://blog.csdn.net/m0_47703222/article/details/107779627
将服务器文件保存到本地 [有转发、浮窗、选择其他应用打开、收藏、保存到手机]
需要使用的组件中
import Vue from 'vue'

// 保存文件
dialogConfirm() {
Vue.prototype.$uniApi.saveFile(this.exportlink);
},
下面这个文件放在 main.js 文件中
const saveFile = function(e) {
	let FileSystemManager = uni.getFileSystemManager();
	uni.downloadFile({
		url: e,
		success: function(res) {
			console.log(res);
			//图片保存到本地
			uni.openDocument({
				filePath: res.tempFilePath,
				showMenu:true,
				success: function(data) {
					FileSystemManager.open({
						filePath: data.savedFilePath,
						success: function(data) {

						},
						fail: function(err) {

						},
						complete(res) {

						}
					})
				},
				fail: function(err) {

				},
				complete(res) {
					console.log(res);
				}
			})
		}
	})
}
上传文件
获取文件的临时路径
chooseMessageFile获取文件的临时路径
  uni.chooseMessageFile({
        count: 1,
        type: 'file',
        success: (res) => {
            uni.showLoading({
                title:'上传中...',
            })
            const path = res.tempFiles[0].path
            let size = res.tempFiles[0].size;
            let filename = res.tempFiles[0].name;
            if (filename.indexOf(".xls") == -1) {
                uni.showModal({
                    title: '提示',
                    content: '文件类型必须为excel!(.xls)',
                    confirmColor: '#0177ff',
                    confirmText: '确定',
                })

            } else {
                //res.tempFiles[0].path
                //这里写选择exec文件后的操作 就可以获取到文件路径了
                console.log(res.tempFiles[0].path);
            }

        }
    })
upload用来将临时文件转换为网络文件upload({ filePath:res.tempFiles[0].path, }).then(ras=>{ uni.hideLoading(); signAddCheck({ data: { code: this.code, file_path: ras.info.path } }).then(res => { if (res.code == 1) { console.log(res.data) } })
完整代码
在api文件中声明这个文件
upload(params) {return req.UPLOAD('file/upload',params)},
import {upload} from "@/api/index.js"
upload() {
uni.chooseMessageFile({
count: 1,
type: 'file',
success: (res) => {
uni.showLoading({
title:'上传中...',
})
const path = res.tempFiles[0].path
let size = res.tempFiles[0].size;
let filename = res.tempFiles[0].name;
if (filename.indexOf(".xls") == -1) {
uni.showModal({
title: '提示',
content: '文件类型必须为excel!(.xls)',
confirmColor: '#0177ff',
confirmText: '确定',
})
} else {
//res.tempFiles[0].path
//这里写选择exec文件后的操作
console.log(res.tempFiles[0].path);
           upload({
                filePath:res.tempFiles[0].path,
            }).then(ras=>{
                uni.hideLoading();
                signAddCheck({
                    data: {
                        code: this.code,
                        file_path: ras.info.path
                    }
                }).then(res => {
                    if (res.code == 1) {
                        console.log(res.data)
                    }
                })
})
}
}
})
},
拍照并上传图片
import {
	upload
} from "@/api/index.js"
方法:
		camera() {
			let that = this;
			uni.chooseImage({
				count: 1, //默认9
				sizeType: ['original', 'compressed'], //可以指定是原图还是压缩图,默认二者都有
				sourceType: ['camera'], //从相册选择  album
				success: (res) => {
					let imagepath = res.tempFilePaths;
					for (let i in imagepath) {
						upload({
							filePath: imagepath[i]
						}).then(res => {
							if (res.code == 1) {
								that.imgsrc = res.info.url;
							}
						})
					}
				}
			});
		},
值存入缓存
将数据存储在本地缓存中指定的 key 中,会覆盖掉原来该 key 对应的内容,这是一个异步接口。
uni.setStorage({
	key: 'storage_key',
	data: 'hello',
	success: function () {
		console.log('success');
	}
});
获取缓存中的 token 值
const token = uni.getStorageSync('token');
地理位置 api 不能使用
在小程序manifase.json中进行配置
  /* 快应用特有相关 */
  "mp-weixin": {
    "appid": "wxa83ab7bd7e9f442b",
    "setting": {
      "urlCheck": false
    },
    "usingComponents": true,
    "permission": {
      "scope.userLocation": {
        "desc": "你的位置信息将用于小程序位置接口的效果展示"
      }
    },
    "requiredPrivateInfos": [
      "getLocation",
      "chooseLocation",
      "onLocationChange",
      "startLocationUpdateBackground",
      "startLocationUpdate"
    ]
  },
修改基础库版本
在微信小程序的主页面中 找到 右上角 详情 ===》 本地设置===》 配置基础库 改为 2.25.4 就可以了
别忘了 需要去微信公众平台申请相关的api调用权限
获取地理位置
获取地区 地址 经纬度 等信息【调用腾讯地图,选择地点】
调用这个方法 然后将 manifest.json 中微信小程序配置中的地理位置授权打开
文字介绍: *** 你的位置信息将用于小程序位置接口的效果展示***
uni.chooseLocation({
    success: res => {
        console.log('位置名称:' + res.name);
        console.log('详细地址:' + res.address);
        console.log('纬度:' + res.latitude);
        console.log('经度:' + res.longitude);
        uni.getLocation({
            type: 'gcj02',
            altitude:true,
            geocode:true,
            success: function(res) {
                console.log('当前位置的经度:' + res.longitude);
                console.log('当前位置的纬度:' + res.latitude);
            }
        });
        console.log('省:' + res.address.slice(0, res.address.indexOf('省') + 1));
        console.log('市:' + res.address.slice(res.address.indexOf('省') + 1, res.address.indexOf('市') + 1));
        console.log('区:' + res.address.slice(res.address.indexOf('市') + 1, res.address.indexOf('区') + 1));
        this.query.address = res.address;
        this.query.latitude = res.latitude;
        this.query.longitude = res.longitude;
        this.query.province = res.address.slice(0, res.address.indexOf('省') + 1)
        this.query.city = res.address.slice(res.address.indexOf('省') + 1, res.address.indexOf('市') + 1)
        this.query.district = res.address.slice(res.address.indexOf('市') + 1, res.address.indexOf('区') + 1)
    }
});
获取经纬度【获取的是当前位置】
uni.getLocation({
    type: 'gcj02',
    success: function (res) {
        console.log('当前位置的经度:' + res.longitude);
        console.log('当前位置的纬度:' + res.latitude);
    }
});
根据经纬度解析出对应的地理位置
			localtion(index) {
				let that =this
				uni.getLocation({
					type: 'gcj02',
					geocode: true,
					success: function(res) {
						console.log(res);
						console.log('当前位置的经度:' + res.longitude);
						console.log('当前位置的纬度:' + res.latitude);
						uni.request({
							url: 'https://restapi.amap.com/v3/geocode/regeo',
							method: 'GET',
							data: {
								location: res.longitude + ',' + res.latitude,
								key: '83a2cb04cb7c947dfeaa59583f4823da', // batch:false,

							},
							success: function(res) {
								console.log("-------------------> 城市解析");
								console.log(res.data.regeocode.formatted_address);
								// _this.geography = res.data.regeocode.formatted_address;
								that.fromData[index].value=res.data.regeocode.formatted_address
								that.$forceUpdate()
							},
							fail: function(err) {
								console.log('地址解析失败' + err);
							}
						})


					}
				});
			},
打开分享图片弹窗,可以将图片发送给朋友、收藏或下载
示例图片:
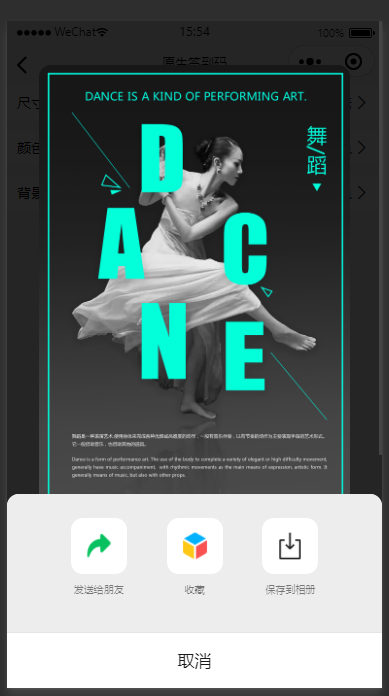
【所有的 wx.方法,都可以直接写成 uni.方法】
wx.showShareImageMenu(Object object) | 微信开放文档 (qq.com)
 uni.downloadFile({
   url: 'https://res.wx.qq.com/wxdoc/dist/assets/img/demo.ef5c5bef.jpg',
   success: (res) => {
     uni.showShareImageMenu({
       path: res.tempFilePath
     })
   }
 })
分享一个 类似于推文的
示例图片
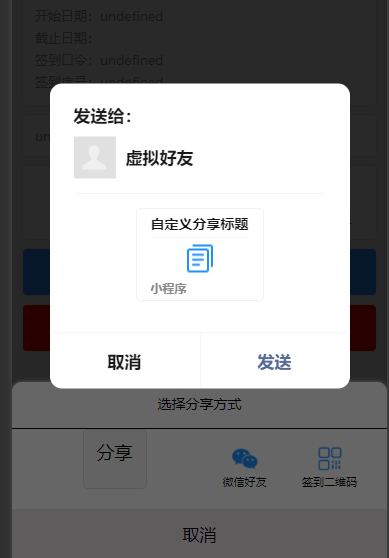
这个必须是button按钮 ,且必须这么写
<button class="buttoncontact" data-name="shareBtn" open-type="share">分享</button>
按钮 html 二
<button class="buttoncontact flex column center" data-name="shareBtn" open-type="share">
    <uni-icons type="redo-filled" color="#0095ff" size="29"></uni-icons>
    <view>分享</view>
</button>
下面这个定义的和 onLoad 平级 来定义
onShareAppMessage(res) {
    if (res.from === 'button') {// 来自页面内分享按钮
        console.log(res.target)
    }
    return {
        title: '自定义分享标题',
        path: '/pages/signIn/detail',
        imageUrl:'/static/images/signIn/copy.png'
    }
},
清除按钮的样式
  .buttoncontact {
        background: none;
        padding: 0;
        margin: 0;
        font-size: 32rpx;
        line-height: 1;

        &::after {
          border: none;
        }
      }
按钮 CSS 二
.buttoncontact {
    background: none;
    padding: 0;
    margin: 0;
    line-height: 1;
    width: 170upx;
    font-size: 28upx;
    display: flex;
    flex-wrap: wrap;
    flex-direction: column;
    justify-content: center;
    align-items: center;
    &::after {
        border: none;
    }
}
调用相机或本机相册的API
uni.chooseImage({
	count: 6, //默认9 这个是可以选择的图片的个数
	sizeType: ['original', 'compressed'], //可以指定是原图还是压缩图,默认二者都有
	sourceType: ['album'], //从相册选择  改为camera是相机
	success: function (res) {
		console.log(JSON.stringify(res.tempFilePaths));
	}
});
crop 参数说明
消息提示框
uni.showToast({
	title: '标题',
	duration: 2000
});
弹出框 uni-ui
<!-- 提示窗示例 -->
<uni-popup ref="alertDialog" type="dialog">
    <uni-popup-dialog type="success" cancelText="关闭" confirmText="删除" title="通知" content="确定要删除此管理员吗?" @confirm="dialogConfirm"
                      @close="dialogClose"></uni-popup-dialog>
</uni-popup>
创建一个点击事件来调用这个窗口
this.$refs.alertDialog.open()
弹出框 代码式
uni.showModal({
    title: '提示',
    content: '这是一个模态弹窗',
    confirmColor: '#ee6666', //确定字体颜色
    showCancel: false, //没有取消按钮的弹框
    buttonText: '确定',
    success: function(res) {
        if (res.confirm) {
            console.log('用户点击确定');
        } else if (res.cancel) {
            console.log('用户点击取消');
        }
    }
});
动态修改 uniapp 的导航栏标题
uni.setNavigationBarTitle({
	title: '复制签到'
});
是否下拉刷新
onPullDownRefresh() {
    //监听下拉刷新动作的执行方法,每次手动下拉刷新都会执行一次
    console.log('refresh');
    setTimeout(function () {
        uni.stopPullDownRefresh();  //停止下拉刷新动画
    }, 1000);
}
———————————————— 版权声明:本文为CSDN博主「攻城狮YanGo」的原创文章,遵循CC 4.0 BY-SA版权协议,转载请附上原文出处链接及本声明。 原文链接:https://blog.csdn.net/weixin_39644462/article/details/83038684
添加右上角的发送给朋友
onShareAppMessage() {},
onShareAppMessage(res) {
    if (res.from === 'button') { // 来自页面内分享按钮
        console.log(res.target)
    }
    return {
        title: 果锅留言,
        path: '/pages/index/index',
        imageUrl: "/static/images/img1.jpg",
    }
},
长按震动
<view @longtap="vibrateShort">{{ house.Name }}</view>
vibrateShort() {
    uni.vibrateShort({
        success: function() {
            console.log('success');
        }
    };
},
<script>
  export default {
    data() {
      return {
        id: "",
        formData:{}
      };
    },
    onLoad(options) {
      console.log('接收的options参数:', options);
      this.id = options.id
    },
    onShow() {

      const db = wx.cloud.database();
      db.collection('question-investigation').where({
        _id: this.id
      }).get({
        success: (res => {
          console.log('返回回来的数据  && this.formData', res.data[0]);
          this.formData = res.data[0]
        })
      })

    },

    methods: {

    }
  }
</script>
图片点击放大
    clickImg(index) {
        console.log(this.formData.imgUrl);
        console.log(index);
        uni.previewImage({
          urls: this.formData.imgUrl, //需要预览的图片http链接列表,多张的时候,url直接写在后面就行了
          current: index, // 当前显示图片的http链接,默认是第一个
          success: function(res) {
            console.log(res,'success');
          },
          fail: function(res) {
            console.log(res,'fail');
          },
          complete: function(res) {
            console.log(res,'complete');
          },
        })
      },